
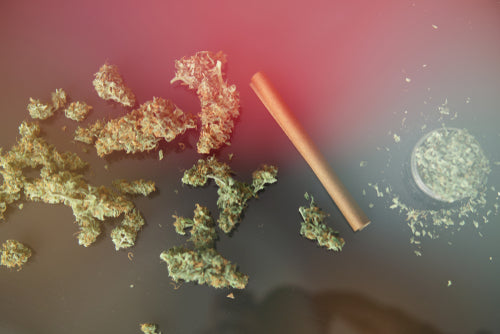
Few things ruin a good session faster than having a stiff hemp wrap snap right down the middle when you try to tuck your material. Those raw stalk fibers pack incredible durability, but losing moisture turns them into fragile sheets that crumble under slight thumb pressure. Throwing away a cracked wrapper or giving up on a half-smoked cylinder feels like a total waste when you have fresh herb sitting ready on your tray. The good news is that dry hemp paper is rarely dead on arrival, and bringing those rigid sheets back to life takes just a little patience, gentle warmth, and humidity. Learning how to properly rehydrate the paper and rebuild your roll lets you save your stash while enjoying a smooth, slow-burning smoke every single time.
Fiber Mechanics and Why Hemp Wraps Dry Out
Industrial hemp wraps are made from long, resilient bast fibers harvested from the outer stalk of the hemp plant. Unlike standard paper sheets made from timber pulp, unrefined hemp wraps skip heavy chemical processing, synthetic plasticizers, and artificial conditioning agents. This raw approach keeps your smoke clean and flavor-neutral, but it also means the paper relies entirely on natural ambient humidity to remain soft and workable.
When a package sits unsealed or rests in a warm room, moisture quickly evaporates from the interwoven plant fibers. As water leaves the natural cellulose grid, the flexible mesh shrinks and tightens up, causing the wrap to stiffen, curl, or turn brittle. Attempting to bend or roll a dehydrated sheet puts extreme tension on those locked fibers, resulting in sharp split lines or outright tearing along the main crease.
Recognizing this fiber behavior reveals why tossing a dry wrap in the trash is a mistake. The underlying physical structure of the hemp fiber remains strong even when totally dry. All the sheet needs is controlled humidity to relax the cellulose weave, restoring the natural elasticity and smooth hand-feel the wrap had when it was freshly packaged.
Assessing Your Paper
Before applying heat or moisture to your wrap, take a moment to look at the exact format of your paper. How you approach rehydration and re-rolling depends heavily on whether you are working with a flat sheet or a pre-shaped cone, as well as whether the wrap is clean or already scorched.
Flat Wraps Versus Pre-Rolled Cones
Flat sheets are the easiest format to revive because you have complete access to the entire surface area of the paper. When a flat wrap dries out, it usually curls at the edges or feels stiff like heavy parchment. Trying to unroll or flatten a dry sheet without treating it first is a fast track to snaps right along the center line. Working with flat sheets gives you total freedom to distribute moisture evenly across both sides before loading your material, letting you fix dry gum lines and roll a tight cylinder from scratch.
Pre-rolled cones present a trickier situation because of their pre-shaped spiral structure and factory seams. If a pre-rolled cone dries out, the paper grows brittle along the spiral seam that holds the cone shape together. Unravelling a dry cone to fix a bad pack almost always ruins that seam. Instead of unrolling a cone, your best bet is to soften the paper while it holds its shape, then gently slide out your material or repack it carefully through the top opening.
Fresh Dry Sheets Versus Half-Smoked Salvages
A clean, unused sheet that dried out in an open pack is ideal for a full moisture reset. These wraps stiffen simply because the original package seal was broken. When dealing with fresh sheets, your main goal is restoring flexibility across the whole paper surface without soaking the natural adhesive strip. Once the fibers absorb a little humidity, the paper handles like new.
Saving a half-smoked roll that went out mid-session takes a few extra preparation steps because of resin and ash buildup:
-
Ash Cleanout: Lightly tap away all loose, dark ash from the burnt end so you don't mix bitter charcoal into your fresh material.
-
Trimming the Charred Paper: Use sharp scissors to snip off the burnt tip, cutting just past the blackened line to expose clean, unburned wrap.
-
Unrolling with Care: Gently pull the remaining seam apart. If hot resins have glued the paper shut, apply slight warmth to soften the oils before unravelling the paper.
-
Material Inspection: Separate the remaining unburned herb from resin-saturated chunks, fluffing up the material before loading it back onto your tray.
The Practical Method for Reviving and Re-Rolling
Once you evaluate your paper, you can bring the dry fibers back to life and craft a clean cylinder. Restoring a dry wrap does not require special equipment, as everyday warmth and controlled moisture get the job done quickly.
Step 1: Rehydrating with Breath Warmth or Steam
The palm method is the simplest way to rehydrate a stiff flat wrap using natural body heat and breath moisture. It works brilliantly on sheets that feel leathery or stiff but haven't snapped into pieces yet:
-
Lay the dry wrap flat across the open palm of one hand.
-
Place your other palm over the top of the wrap, creating a warm, enclosed pocket around the paper without pressing down hard enough to crease it.
-
Bring your cupped hands up to your mouth and exhale long, slow breaths directly into the gap between your hands for 15 to 20 seconds. The warm moisture from your breath quickly penetrates the dry cellulose fibers.
-
Open your hands and test the paper; if it feels soft and pliable, you’re ready to roll.
If a hemp sheet is bone-dry and crackles when touched, steam offers a faster, deeper rehydration option. Hold the dry wrap securely with metal kitchen tongs to protect your fingers from heat. Hold the paper six to eight inches above the steam rising from a boiling kettle or a hot cup of water for three to five seconds. Turn the sheet over to let steam hit both sides evenly. Avoid holding the paper in the steam path for too long, as soaking the sheet will dissolve the natural adhesive line and leave the paper too soggy to hold shape.
Step 2: Preparing the Edge and Packing Product
With your wrap restored to a soft, workable state, set up your workspace to build a solid roll. Proper preparation at this stage prevents air gaps and secures a straight, predictable burn.
Take a quick look at the adhesive edge of your revived wrap. On some hemp sheets, drying out weakens the pre-applied natural gum line, causing it to lose its grip once wetted. If the original glue line looks worn or refuses to stick, you can reinforce the seal using natural organic honey. Dip the tip of a toothpick into organic honey and smear an ultra-thin layer along the sealing edge of the wrap. Honey acts as a great natural binder that holds firm while burning down with a pleasant, subtle sweetness. Alternatively, thoroughly moistening the raw edge with saliva works well on raw hemp fibers without any added glues.
Adding a firm filter tip or rolled paper crutch at one end of your wrap provides structural support that keeps the mouthpiece from collapsing while you smoke. Place your rolled crutch at the very edge of one end, letting a tiny sliver extend past the paper border. Next, spread your broken-down, fluffy plant material evenly along the center trough of the wrap, keeping the height consistent from the crutch all the way to the front tip. Avoid overpacking the center, as crowding too much material into a single spot creates dense lumps that restrict airflow.
Step 3: Performing the Tuck, Roll, and Seal
With your plant material centered and your filter tip anchored, your softened hemp sheet is ready for shaping. Executing a tight roll requires a steady hand and a continuous motion so the paper seals flush against the herb without trapping loose air gaps inside:
-
Shape the Log: Hold the filled wrap with both hands, placing your thumbs underneath and index fingers along the top to shape your herb into a uniform log. Roll the sheet back and forth between your fingers a few times to compress the plant material evenly.
-
Anchor the Tuck: Fold the long edge closest to you over the top of the material, then tuck it tightly behind the herb. Start right next to the filter crutch and work your way down to the opposite end, securing a firm anchor at the mouthpiece.
-
Roll Upward: Use your thumbs to roll the wrap upward in one smooth motion. Maintain slight outward pressure with your fingers toward both ends to stop wrinkles or loose folds from forming along the body.
-
Seal the Seam: Stop rolling once only the adhesive edge remains exposed. Wet the gum line or honey strip thoroughly, lay the seam flat over the roll, and smooth your thumb across the full length to lock the seal tight without air bubbles.=
Step 4: Heat-Drying and Setting the Seam
Your wrap is rolled and sealed, but taking a drag immediately can cause the wet seam to pull apart under draw pressure. Setting the seal with controlled heat locks the structure in place and prepares the roll for an even burn.
Hold a lighter flame about an inch below the wet seam of your finished roll. Pass the flame back and forth along the length of the seam in quick, fluid movements, never allowing the flame to rest in one spot for more than a second. This gentle heat dries out excess moisture from saliva or honey, slightly heat-shrinks the hemp paper, and bakes the seam into a firm, durable seal. Once the paper feels dry and tight to the touch, your revived hemp roll is completely ready to light up.
Preserving Paper Flexibility for Future Sessions
Once you know how to bring dry wraps back to life, taking a few basic preventive steps will save you time on future rolls. Keeping your paper stock in prime condition comes down to managing environmental humidity and handling your packs with care.
Always store open wrap packages inside an airtight zipper pouch or a small sealable container. If you live in a particularly dry climate, dropping a tiny hydro-stone or a humidity control packet into your storage pouch will keep the raw hemp fibers soft for months. Avoid leaving loose wraps sitting out on open trays or near direct heat sources like sunny windows or laptop vents, as dry indoor air strips moisture from raw paper in a matter of hours.
If a wrap feels slightly stiff right out of the pack, do not force the fold immediately. Giving the paper a quick five-second palm warm-up before you load your herb relaxes the fibers preemptively, preventing micro-tears along the seam before they even have a chance to start.
Mastering the Re-Roll for Zero Waste
Turning a brittle, unusable sheet into a pliable, slow-burning roll gives you complete control over your rolling tray while keeping good material out of the trash bin. Balancing warmth and moisture restores natural fiber elasticity, allowing you to craft a tight seam that burns clean from start to finish. Once you master these simple rehydration habits, a dry pack or damaged edge stops being a frustrating roadblock and becomes a simple quick fix. Taking a minute to prep your paper guarantees that every session delivers the smooth draw and rich plant flavor you expect without wasting a single pinch of your stash.
Share:
A Brief History of Bolivar Cigars
Mastering the Fine Art of 'Cigar Tasting'